Multi factor authentication
Akin to SSH keys, multi-factor authentication (MFA) provides an additional layer of security by requiring users to provide two or more verification factors to gain access to a resource.
One-time passwords
Time-based One-time Passwords (TOTP) are a common form of multi-factor authentication that provides an additional layer of security. CISM supports OTP for accessing its Nextcloud and Jupyterlab services.
It works by combining a shared secret key with the current time, typically changing every 30 seconds, to produce a numeric code that is valid only for a short period. To use TOTP, users typically need to set up an authenticator application on their mobile device. Google Authenticator (for Android or for iOS) and FreeOTP have been tested and work reliably. However, if you already use another OTP application, you may continue to use it as long as it supports the TOTP standard.
Configuring TOTP typically involves scanning a QR code provided by the service you want to secure, which contains the shared secret key. Once set up, the authenticator app will generate a new OTP every 30 seconds, which you will need to enter along with your password when logging in.
Nextcloud
Nextcloud has TOTP support built-in, allowing users to easily enable multi-factor authentication for their accounts.
Configuring TOTP
In your “Personal Settings”, locate the “TOTP (Authenticator app)” option under “Security”.
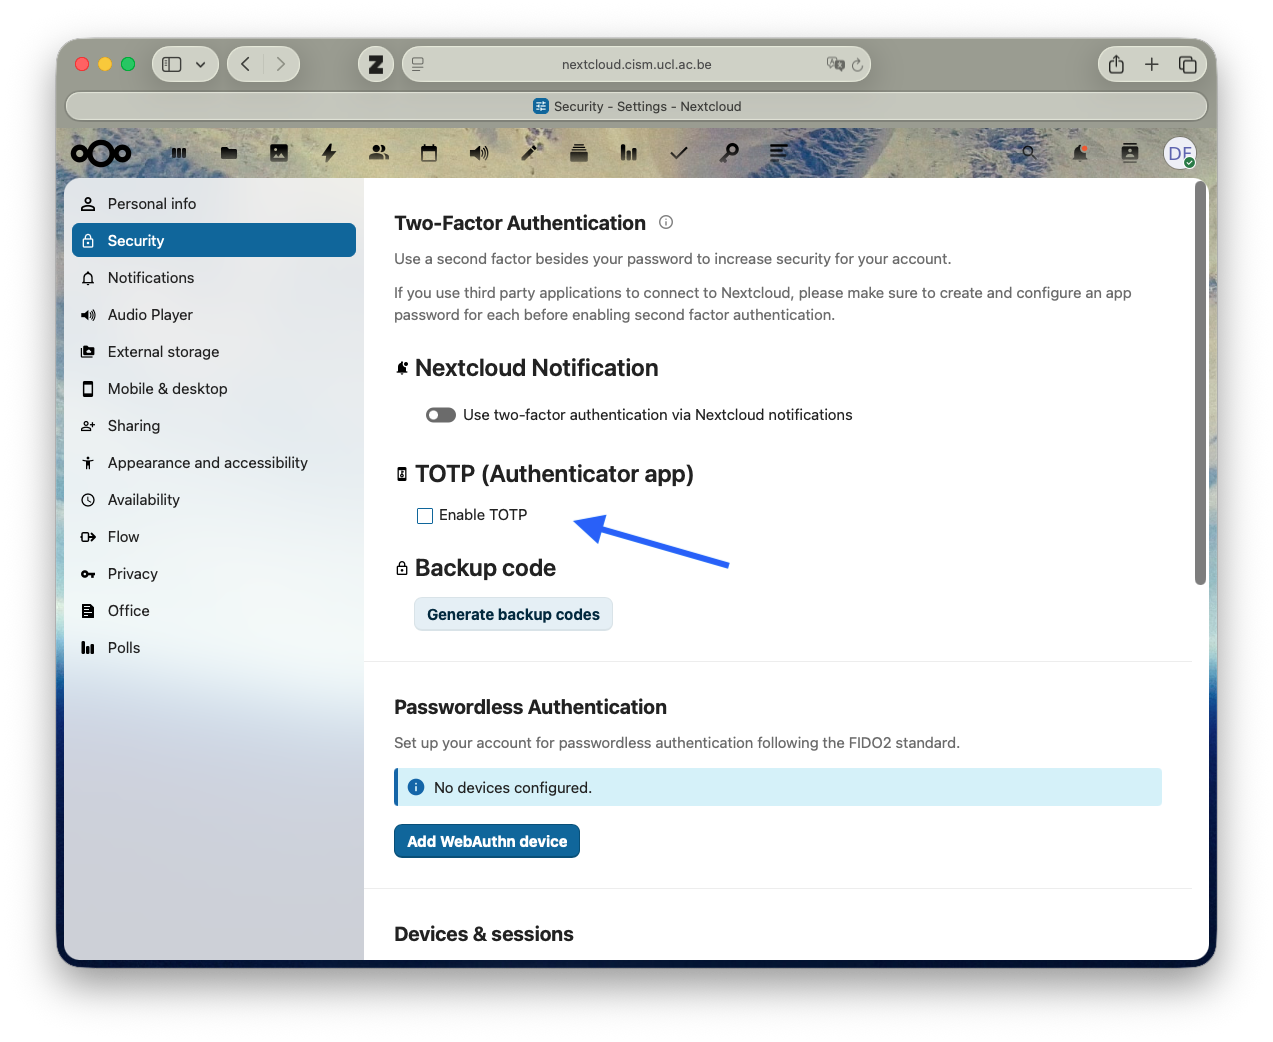
Click on “Set up TOTP” and follow the instructions to scan the QR code with your authenticator app.
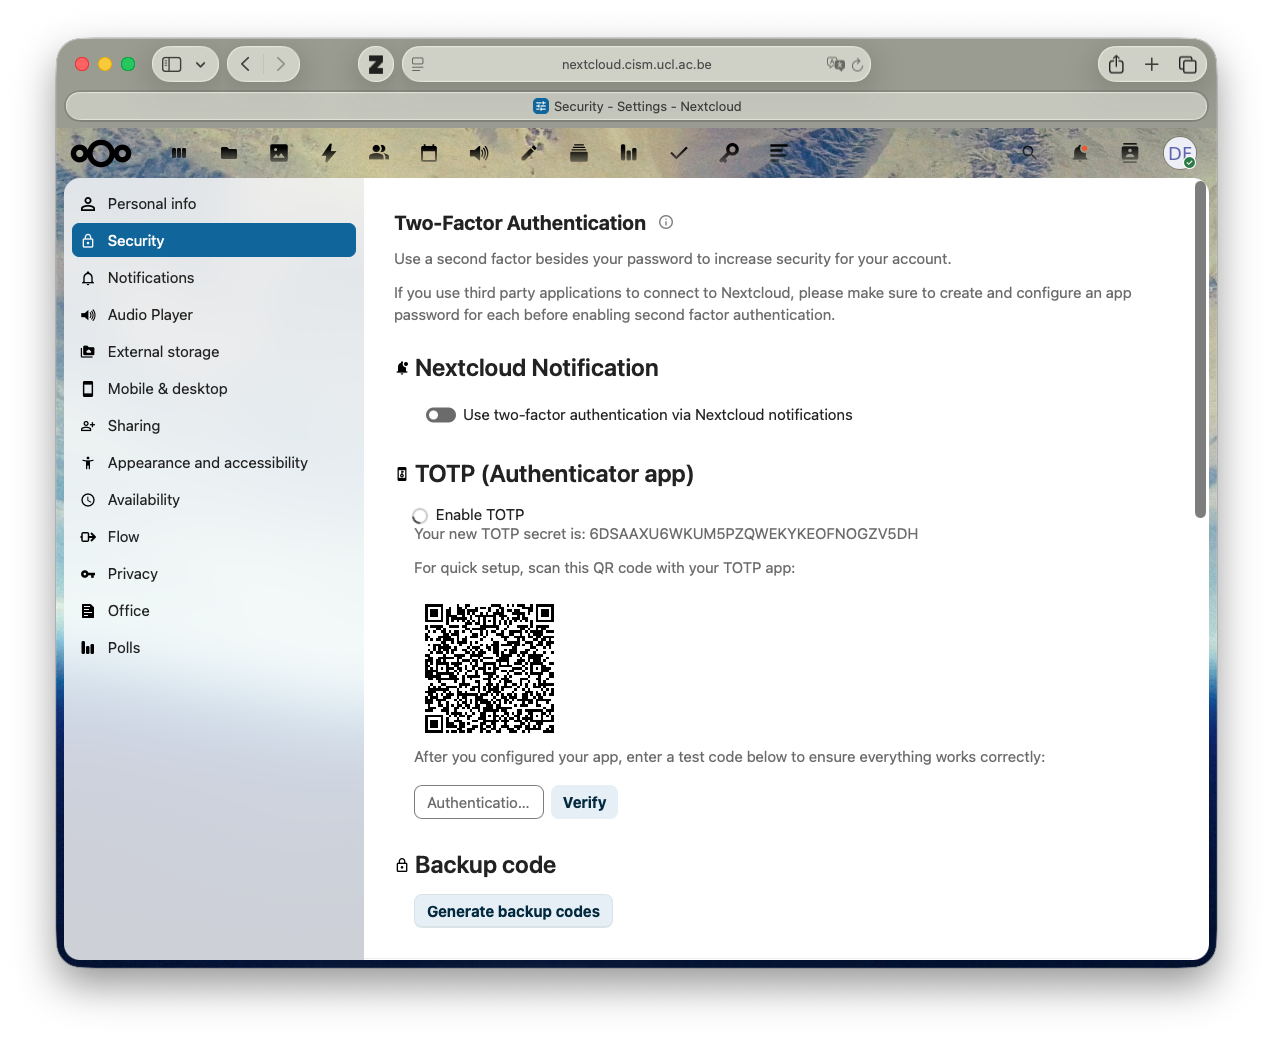
After successfully scanning the QR code, you will be prompted to enter a verification code generated by your authenticator app to confirm the setup.
Logging with TOTP
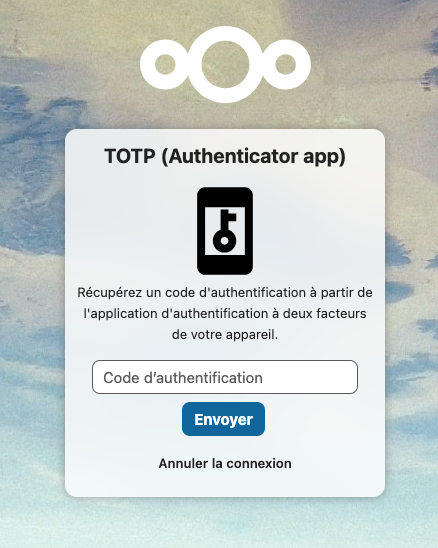
When logging in to Nextcloud, after entering your username and password, you will be prompted to enter a verification code from your authenticator app. Open your app, find the entry for CISM Nextcloud, and enter the current code displayed.
More information about logging in with TOTP can be found in the Nextcloud documentation.
Jupyterlab
By contrast to Nextcloud, Jupyterlab does not have built-in support for TOTP. However, it is possible to configure TOTP for Jupyterlab by running the google-authenticator command in a Jupyterlab terminal.
Configuring TOTP
When connected to Jupyterlab, open a terminal by clicking on the “Terminal” icon in the launcher.
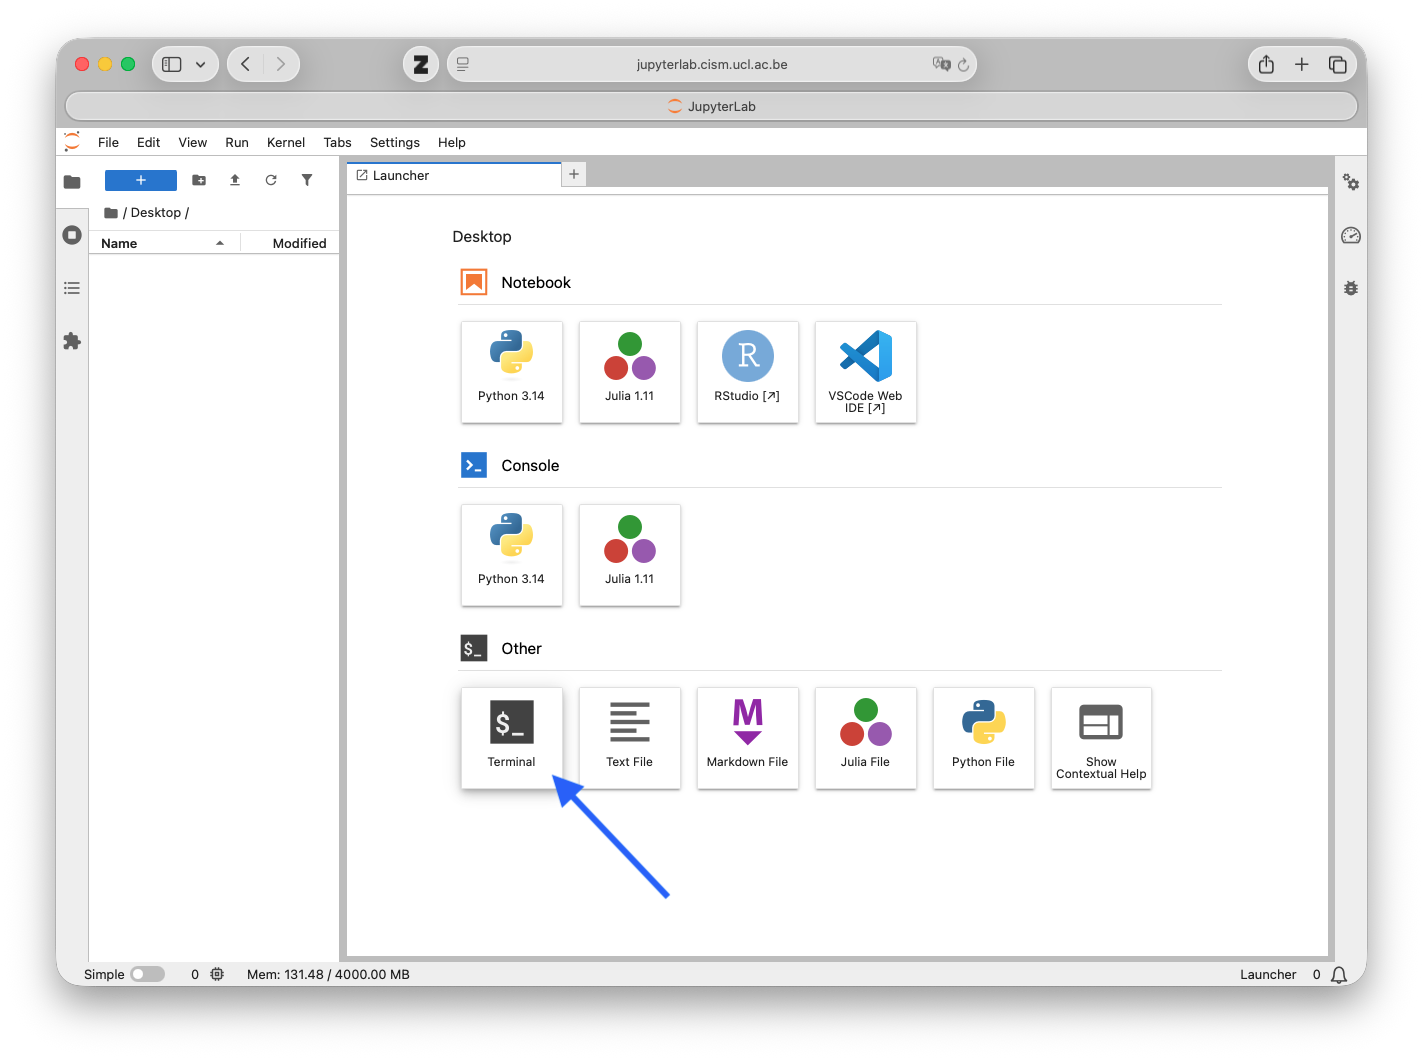
In the terminal, run the following command to start the TOTP configuration process:
google-authenticator
This command will prompt you with a series of questions to set up TOTP for your Jupyterlab account.
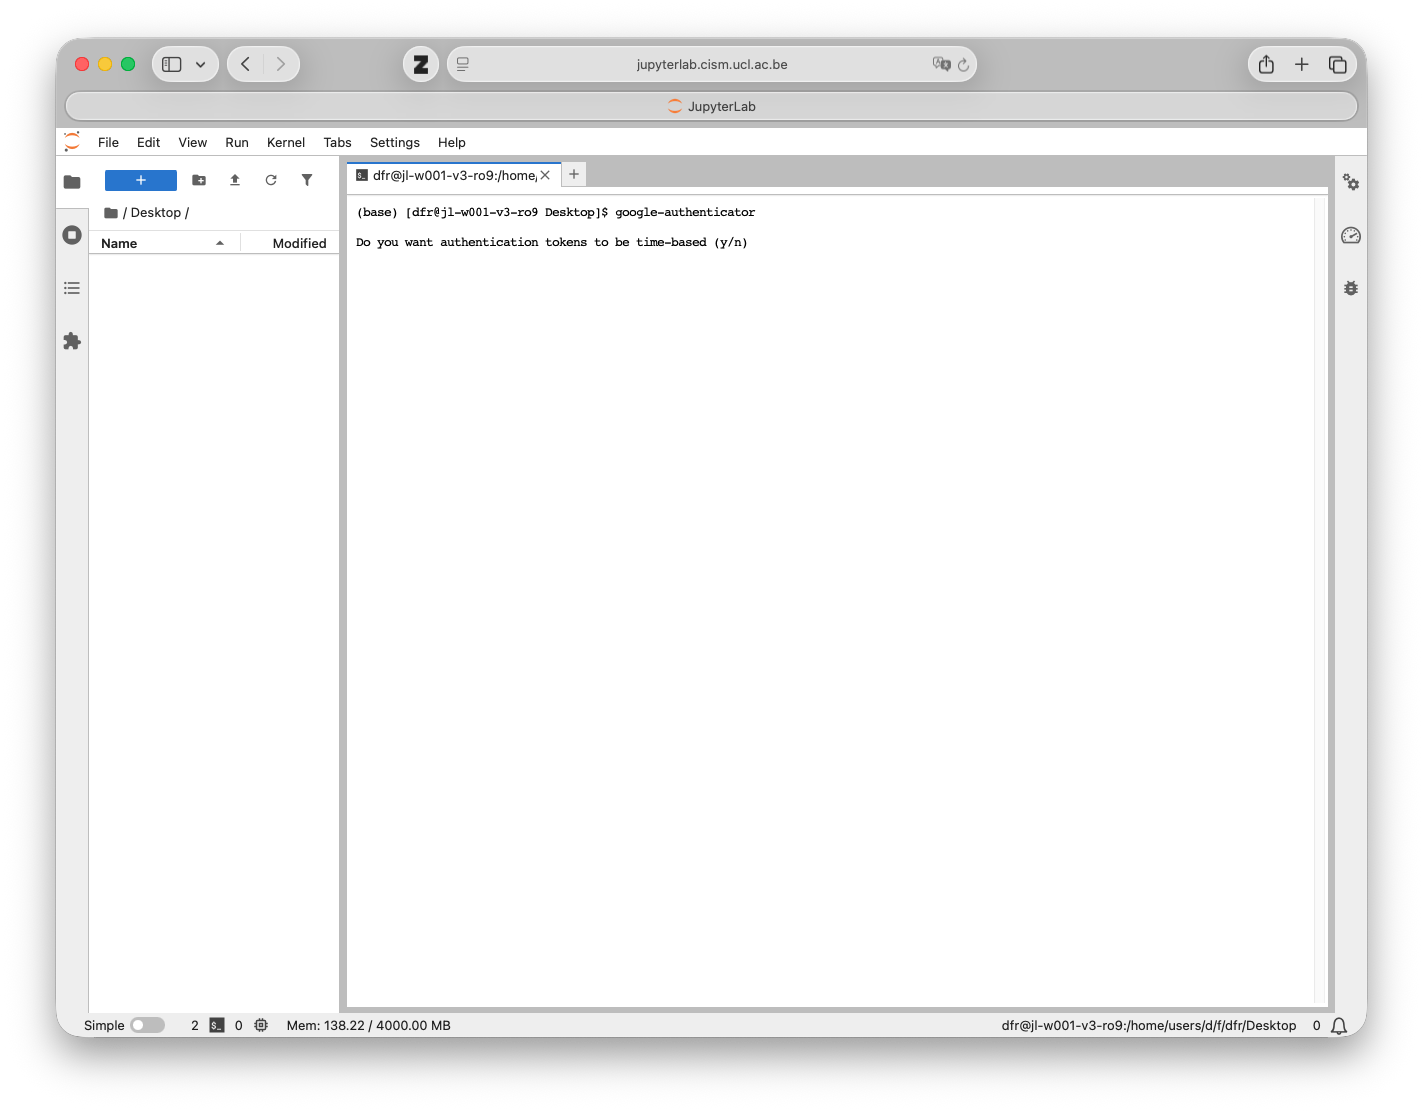
Answer Yes to the first question.
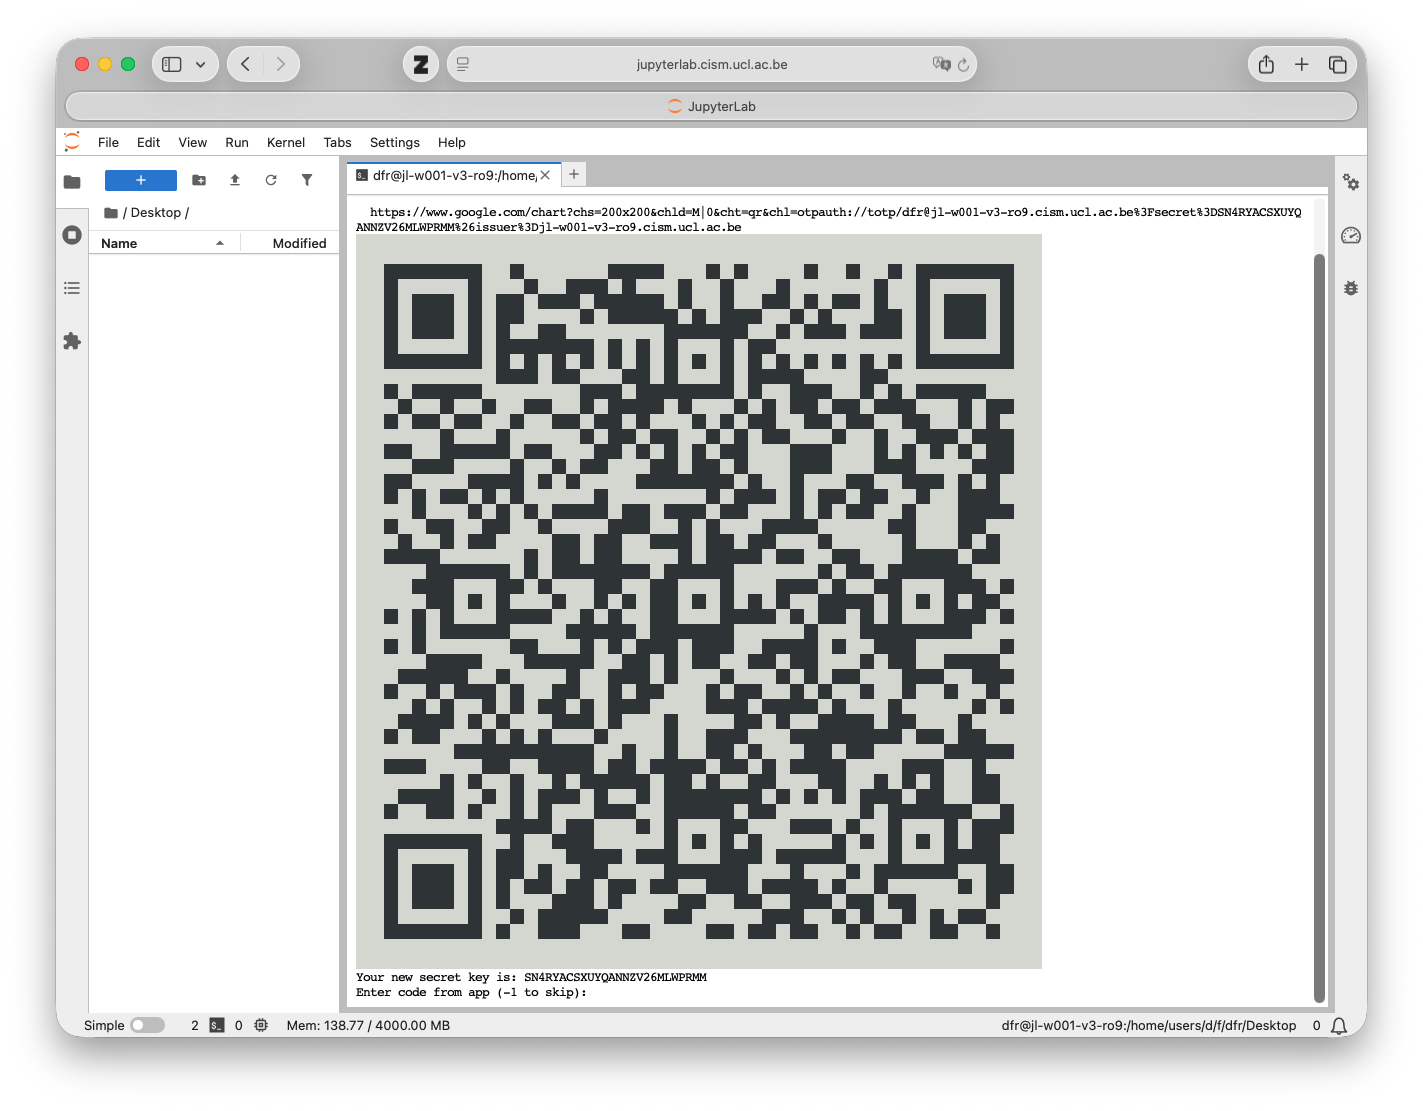
Scan the QR code with your authenticator app to add the TOTP entry for Jupyterlab.
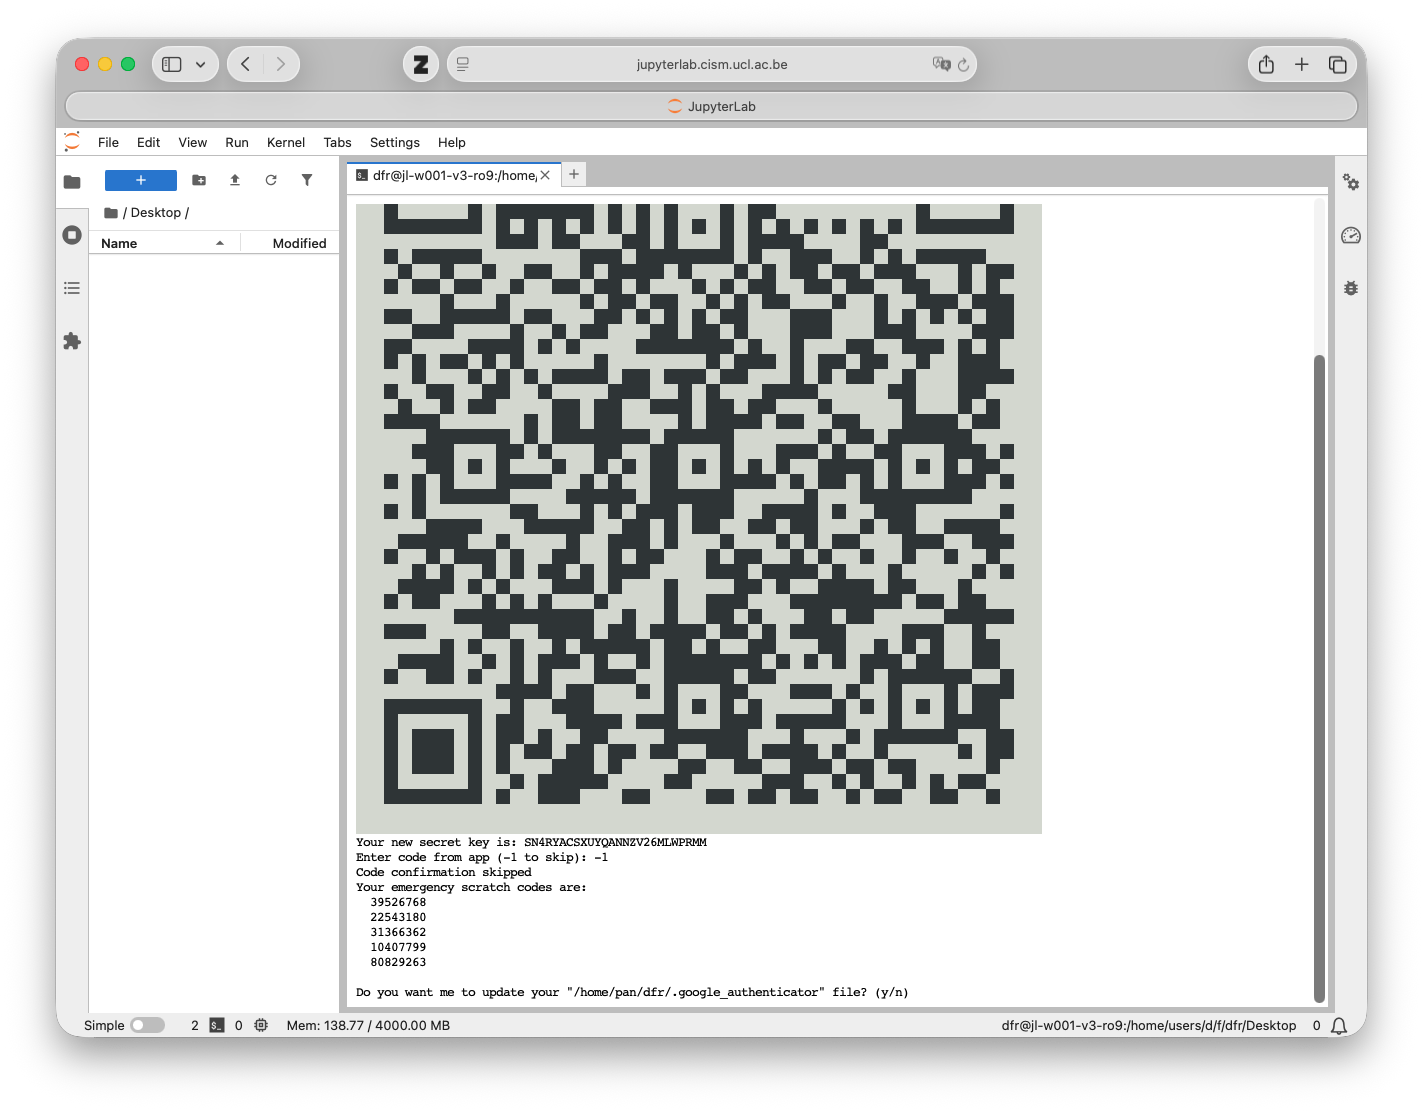
Ans wer Yes to the next question to update the ~/.google_authenticator file with the new TOTP configuration.
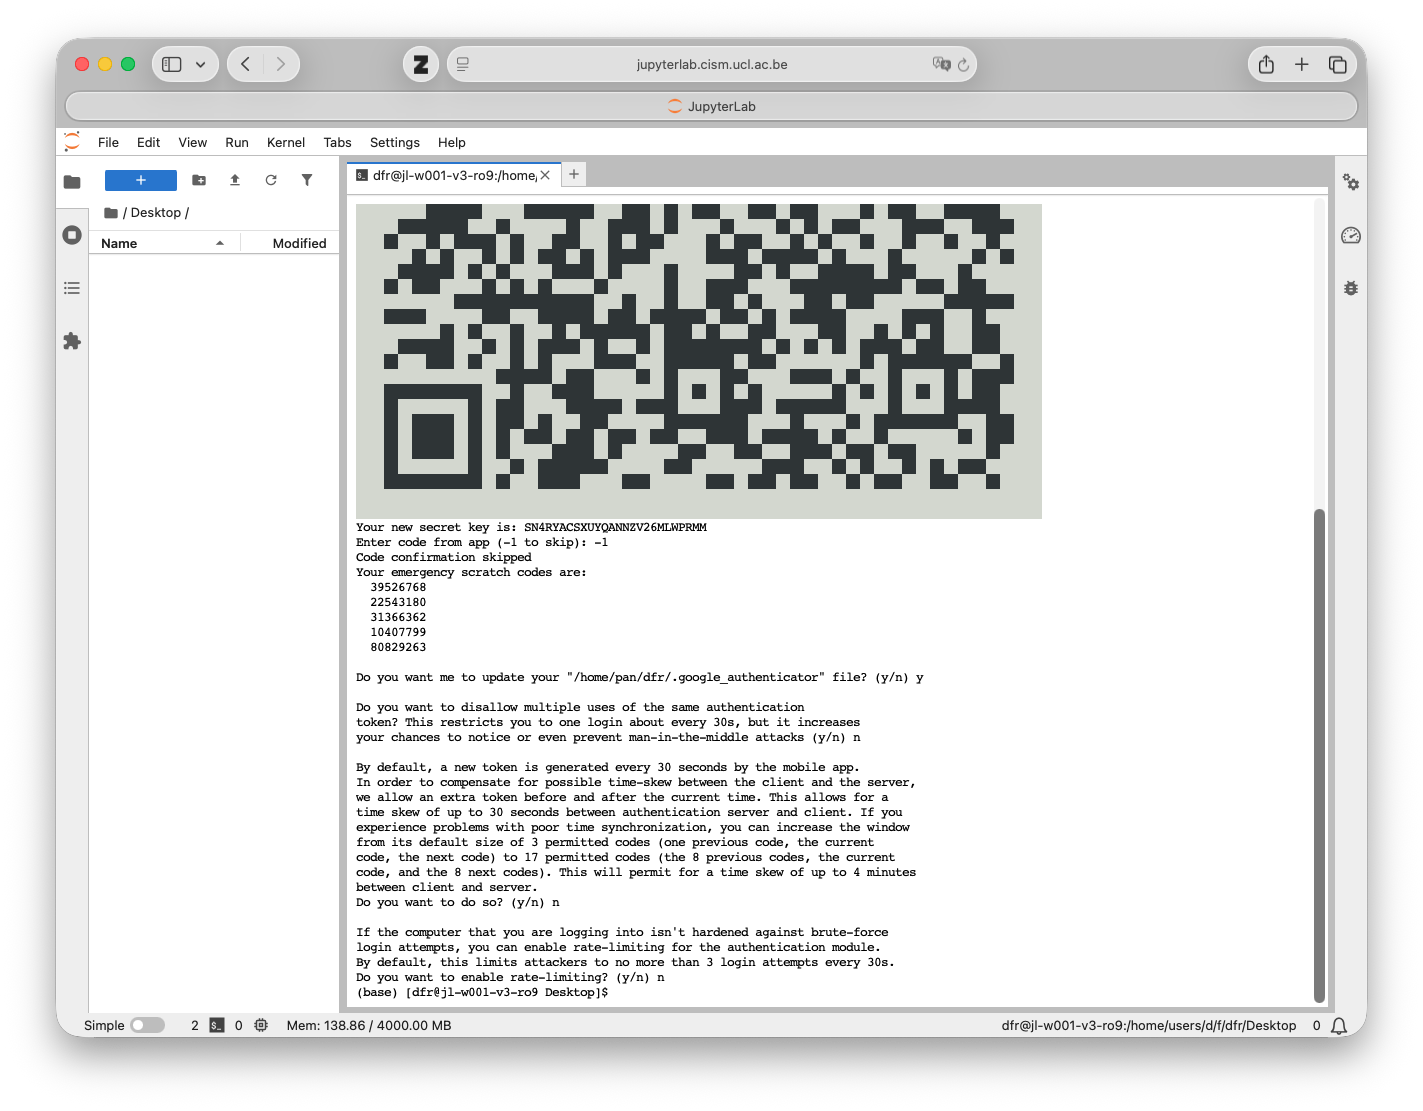
Anser Yes or No to the next questions based on your preferences. Answering Yes to those questions will enhance the security of your TOTP configuration, but may also make it less convenient to use.
Logging with TOTP
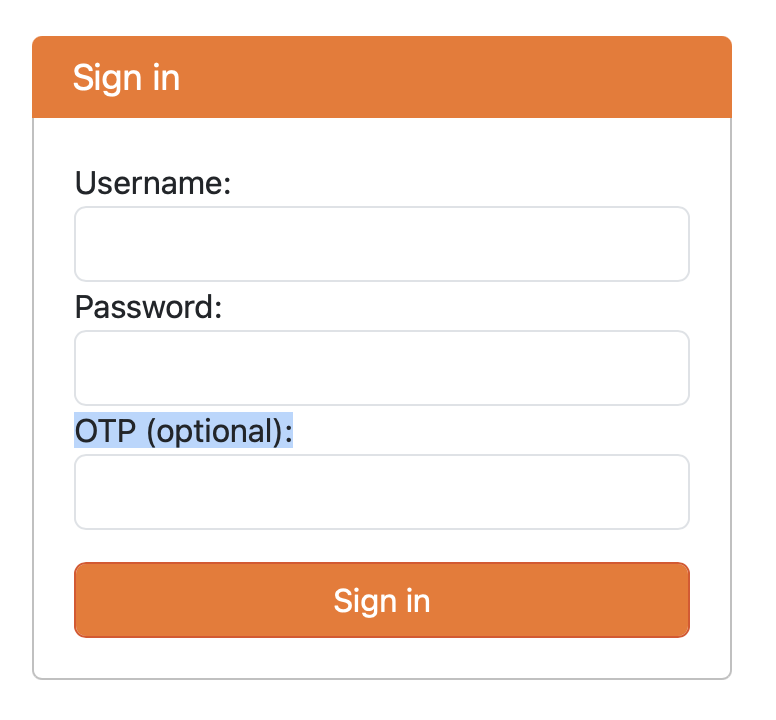
When logging in to Jupyterlab, enter your username and password as usual and also the verification code from your authenticator app in the OTP (optional): field.